The Dyeing Process
The Process...
Here is an overview of the many steps involved when I create this fine, silk wearable art.
1) Wash, dry, and press scarf blanks. (actually that's three steps!) This is done to rid the silk of any oils and dirt from the manufacturing process and then the hand-sewing of the edges.

2) If there is a line art design, this is applied to the silk with gutta resist and allowed to dry. Don't forget the time spent creating the design, researching, drawing it out full size, and then drawing the design on the silk.

3) Mix and apply dye, this may take minutes or hours depending on the technique and intricacy of design. Let it dry.


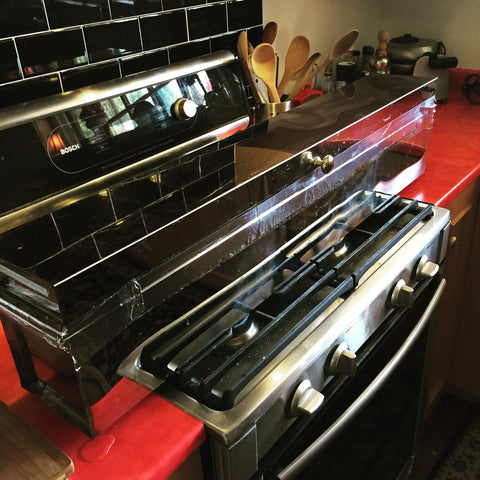
4) Steaming is the next step. I build up a batch of 10-12 silks before steaming. Silks are carefully rolled between sheets of newsprint and sealed up before placing in the steamer (a long, rectangular, stainless steel box specially designed so the steam condensate doesn't drip on the roll of silks.) It takes 3+ hours of simmering on the stove.


5) After the silks have cooled, I unroll them and let dry once again--they come out of the steamer slightly damp. I let them hang for at least a day in order to let the colors really set.

6) Each scarf is washed out separately in order to ensure that any loose color that washes out doesn't "back stain" another scarf with different colors. This requires a wash in a special detergent to lift unengaged dye out of the silk and then they get several rinses before hanging to dry...for each scarf.

7) Each silk is then carefully pressed with a steam iron to get out any wrinkles and prepare it for the all-important product photography.

8) At this point the scarves are photographed, each one is styled in various ways (flat, scrunched, in a circle, wrapped around a mannequin bust) to give the customer a good idea of the colors and designs. No less than four shots of each one and often more to show close up details.
9) A hang tag is created, a clever title thought of and written on the tag, along with notation of its size, price, and my signature. (These have been previously printed on the computer and hand-cut apart, hole-punched, and hanging ribbon attached).

10) Finally, it's time to sit in front of the computer, upload the photographs, sort and edit them.

11) Create a listing for my website with a description and price and upload that information.
12) Create a snappy and engaging post for Instagram and Facebook! It's all part of the process!
13) NOW...the hand-dyed silk scarves are ready to sell to appreciative, discerning customers!
14) Your scarf is carefully wrapped in tissue and cellophane to ensure its safe delivery by priority mail. Gift wrapping is available free of charge! Address the box, take it to the post office, and keep my fingers crossed it arrives at its intended destination! I always appreciate an email or text letting me know that it has arrived safely.
